

Spring MVC
什么是SpringMVC
SpringMVC是Spring提供的一个基于MVC设计模式的轻量级WEB开发框架,本质上相当于Servlet。
SpringMVC快速入门
导入相应的jar包
1
2
3
4
5
6
7
8
9
10
11
12
13
14
15
16
17
18
19
20
21
22
23
24
25
26<dependencies>
<dependency>
<groupId>javax.servlet</groupId>
<artifactId>javax.servlet-api</artifactId>
<version>3.1.0</version>
<scope>provided</scope>
</dependency>
<dependency>
<groupId>org.springframework</groupId>
<artifactId>spring-webmvc</artifactId>
<version>5.2.10.RELEASE</version>
</dependency>
</dependencies>
<build>
<plugins>
<plugin>
<groupId>org.apache.tomcat.maven</groupId>
<artifactId>tomcat7-maven-plugin</artifactId>
<version>2.1</version>
<configuration>
<port>80</port>
<path>/</path>
</configuration>
</plugin>
</plugins>
</build>创建SpringMVC控制器类(等同于java中的servlet)
UserController.java
1
2
3
4
5
6
7
8
9
10
11
12
13
14
15
16
17
18
package com.learn.controller;
import org.springframework.stereotype.Controller;
import org.springframework.web.bind.annotation.RequestMapping;
import org.springframework.web.bind.annotation.ResponseBody;
// 2.定义controller
// 2.1使用@Controller定义bean,这是做SpringMVC专用的注解
public class UserController {
// 2.2设置当前操作的访问路径
// 2.3设置当前操作返回什么
public String save(){
System.out.println("user save ...");
return "{'module':'springmvc'}";
}
}初始化SpringMVC环境(同Spring环境)就是声明方法不一样,设定springMVC加载对应的bean
SpringMvcConfig
1
2
3
4
5
6
7
8
9
10
11
package com.learn.config;
import org.springframework.context.annotation.ComponentScan;
import org.springframework.context.annotation.Configuration;
//3.创建springmvc的配置文件,加载controller对应的bean
public class SpringMvcConfig {
}初始化Servlet容器,加载SpringMVC环境,并设置SpringMVC技术处理的请求
ServletContainerInitConfig
1
2
3
4
5
6
7
8
9
10
11
12
13
14
15
16
17
18
19
20
21
22
23
24
25
26
27
28
package com.learn.config;
import org.springframework.web.context.WebApplicationContext;
import org.springframework.web.context.support.AnnotationConfigWebApplicationContext;
import org.springframework.web.servlet.support.AbstractDispatcherServletInitializer;
//4.定义一个servlet容器启动的配置类,在里面加载spring的配置
public class ServletContainerInitConfig extends AbstractDispatcherServletInitializer {
// 加载springmvc容器配置
protected WebApplicationContext createServletApplicationContext() {
// 告诉tomcat记得加载spring的配置
AnnotationConfigWebApplicationContext ctx=new AnnotationConfigWebApplicationContext();
ctx.register(SpringMvcConfig.class);
return ctx;
}
// 设置哪些请求归属springMVC处理
protected String[] getServletMappings() {
return new String[]{"/"};
}
// 加载spring容器配置
protected WebApplicationContext createRootApplicationContext() {
return null;
}
}
bean加载控制
在加载项目时默认是Spring接管整个项目,这会使得原本属于SpringMVC的bean被Spring错加载,因此我们需要通过对bean的控制使得SpringMVC获取到他应当使用的bean
- 对于SpringMVC相关的bean加载控制:
SpringMVC所要加载的bean均在com.learn.controller
对于Spring相关的bean加载控制
方法一:Spring加载的bean设定扫描范围为com.learn排除掉中间的controller
在Spring配置类中:
1
方法二:Spring加载的bean设定扫描范围为精准范围,例如service包、dao包等
在Spring配置类中:
1
2
3
4
5
6
7
8
//excludeFilters:排除指定的路径的bean,需要指定类型(type)和具体项(classes)
//includeFilters:加载指定的bean,需要指定类型(type)和具体项(classes)方法三:不区分Spring和SpringMVC,加载在同一个环境中
ServletContainerInitConfig.java
1
2
3
4
5
6
7
8
9
10
11
12
13
14
15
16
17
18
19
20
21
22
23
24
25
26
27
28
29
package com.learn.config;
import org.springframework.web.context.WebApplicationContext;
import org.springframework.web.context.support.AnnotationConfigWebApplicationContext;
import org.springframework.web.servlet.support.AbstractDispatcherServletInitializer;
//4.定义一个servlet容器启动的配置类,在里面加载spring的配置
public class ServletContainerInitConfig extends AbstractDispatcherServletInitializer {
// 加载springmvc容器配置
protected WebApplicationContext createServletApplicationContext() {
// 告诉tomcat记得加载spring的配置
AnnotationConfigWebApplicationContext ctx=new AnnotationConfigWebApplicationContext();
ctx.register(SpringMvcConfig.class);
return ctx;
}
// 设置哪些请求归属springMVC处理
protected String[] getServletMappings() {
return new String[]{"/"};
}
// 加载spring容器配置
protected WebApplicationContext createRootApplicationContext() {
AnnotationConfigWebApplicationContext ctx=new AnnotationConfigWebApplicationContext();
ctx.register(SpringConfig.class);
return ctx;
}
}简化开发:
1
2
3
4
5
6
7
8
9
10
11
12
13
14
15
16
public class ServletContainerInitConfig extends AbstractAnnotationConfigDispatcherServletInitializer {
protected Class<?>[] getRootConfigClasses() {
return new Class[]{SpringConfig.class};
}
protected Class<?>[] getServletConfigClasses() {
return new Class[]{SpringMvcConfig.class};
}
protected String[] getServletMappings() {
return new String[]{"/"};
}
}
请求与响应
请求映射路径
当两个方法使用一个名字就会报错所以我们在写路径时一定注意区分
将@RequestMapping放在外边就是路径前缀
例如:
1 | package com.learn.controller; |
路径就等同于http://localhost/book/save
get和post请求
get请求传参
普通传参:通过URL地址传参,地址参数名和形参参数名一致即可接收到

1 | package com.learn.controller; |
post请求传参
普通传参:通过请求体传参,要求表单参数名和形参变量名一致
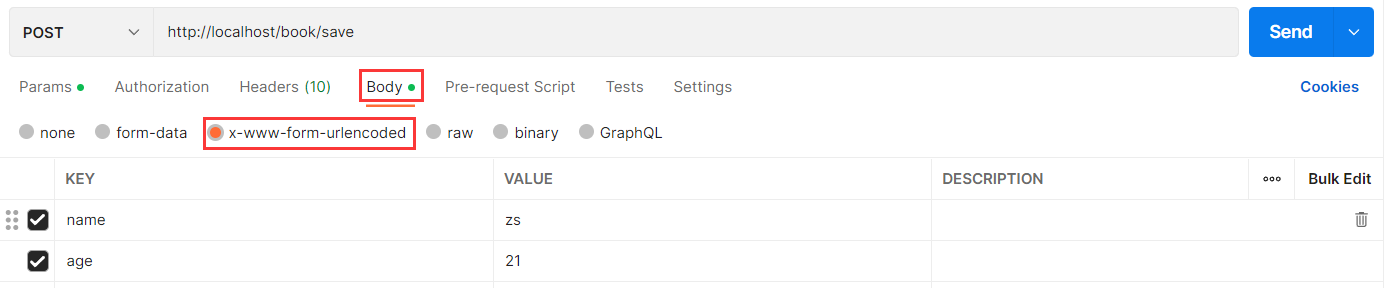
1 | package com.learn.controller; |
五种参数传递
pojo传递
如果我们接收的表单信息太多,按照上面的方法就要在形参列表中放置大量的变量,而这无疑会大大增加我们的代码量,针对这种情况我们可以使用pojo参数传递解决
1 | package com.learn.controller; |
注:其中User是pojo类
嵌套pojo参数
所谓嵌套pojo就是在pojo中还放着引用类型对象,例如User里有name、age和Address,Address中有city和province
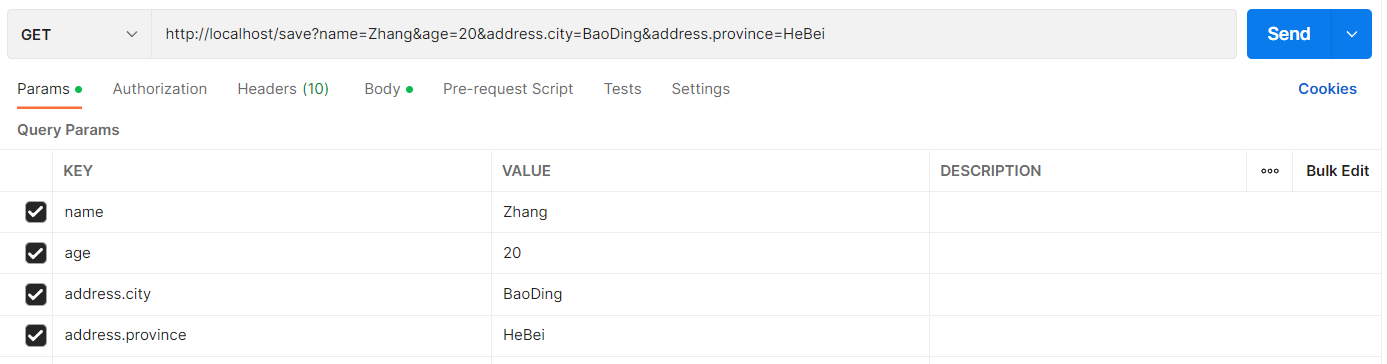
1 |
|
结果:User[name=’Zhang’, age=20, address=Address[province=’HeBei’, city=’BaoDing’]]
数组参数
解决复选框问题,只需要在前端将复选框名字命名成一个,就可以把得到的数据组合成数组
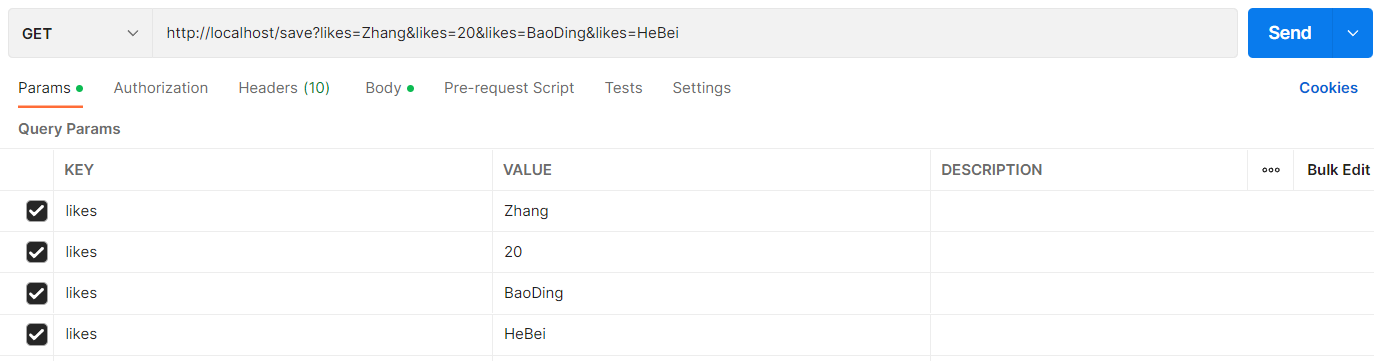
1 |
|
结果:[Zhang, 20, BaoDing, HeBei]
集合参数
用法和上面差不多
1 |
|
结果:[Zhang, 20, BaoDing, HeBei]
JSON数据传递参数
- 首先引入需要的jar包
1 | <dependency> |
接收数据
注意接受josn数据需要将@RequestParam更换成@RequestBody
JOSN数组

1
2
3
4
5
6
7
8
9
10
11
public class UserController {
// 2.2设置当前操作的访问路径
// 2.3设置当前操作的返回值类型
public String save( List<String> list){
System.out.println(list);
return "{'module':'springmvc'}";
}
}接收到的数据:[game, music, travel]
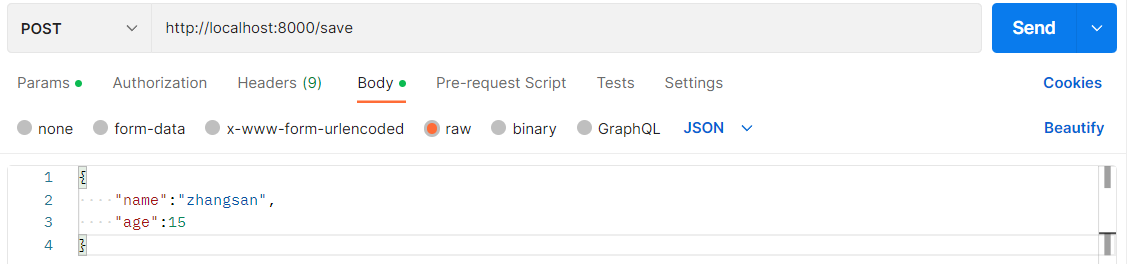
JSON对象(pojo)
1
2
3
4
5
6
7
8
9
10
public class UserController {
public String save( User user){
System.out.println(user);
return "{'module':'springmvc'}";
}
}得到结果:User[name=’zhangsan’, age=15, address=null]
JSON数组(pojo)
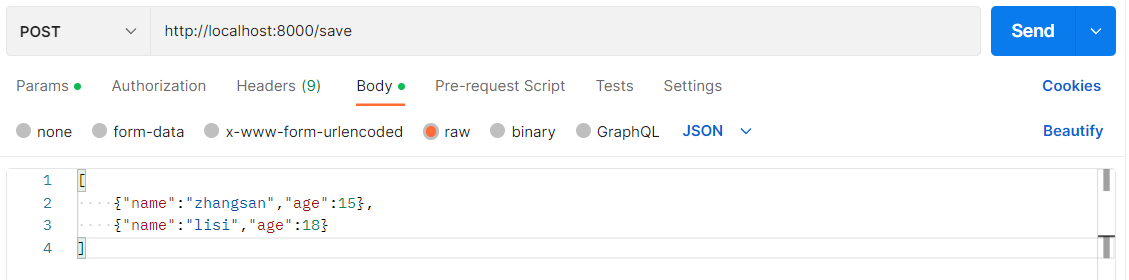
1
2
3
4
5
6
7
8
9
10
11
public class UserController {
// 2.2设置当前操作的访问路径
// 2.3设置当前操作的返回值类型
public String save( List<User> list){
System.out.println(list);
return "{'module':'springmvc'}";
}
}得到的结果:[User[name=’zhangsan’, age=15, address=null], User[name=’lisi’, age=18, address=null]]
日期型参数传递
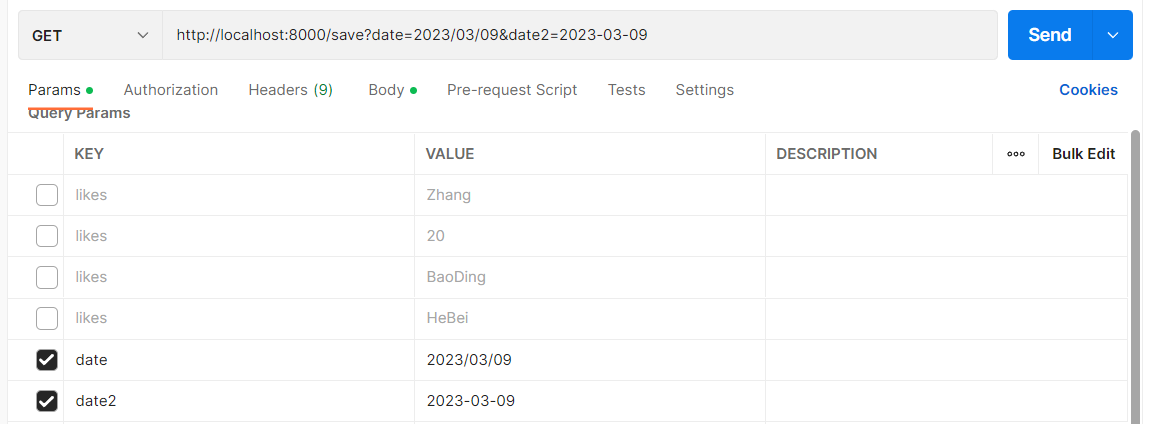
1 |
|
响应
跳转页面
只需要在原基础上删掉@ResponseBody
1 | package com.learn.controller; |
响应返回JSON数据
1 | public class UserController { |
前端接到的返回数据:{“name”:”itcat”,”age”:15,”address”:null}
REST风格
REST:表现形式状态转换
- 传统风格资源描述形式:
- REST风格描述形式
优点:1. 隐藏资源的访问行为,无法通过地址得知对资源是什么操作
2. 书写简化
REST风格操作
REST按照访问资源的路径和行为动作来区分资源进行了何种操作
| 网址 | 想要的操作 | 行为 |
|---|---|---|
| http://localhost/users | 查询全部用户信息 | GET查询 |
| http://localhost/users/1 | 查询指定用户信息 | GET查询 |
| http://localhost/users | 添加用户信息 | POST(新增/保存) |
| http://localhost/users | 修改用户信息 | PUT(修改/更新) |
| http://localhost/users/1 | 删除用户信息 | DELETE(删除) |
示例:
1 | package com.learn.controller; |
异常处理器
在运行springmvc时,难免会出现各种各样的错误,并且每一层都会出错。我们不能向前端传输一个500或者404错误吧。因此我们可以让各层都暂时将错误抛出,把错误都放在最上层也就是表现层统一处理,但是如果每一个都try…catch的话代码就会变得臃肿。
表现层处理异常,每个方法中单独书写,代码书写量巨大且意义不大,如何解决——AOP思想
SpringMvc为我们自动提供了一个异常处理器:
在表现层中创建ProjectExceptionAdvice类做异常处理
1 | package com.itheima.controller; |
届时页面就会显示:
{
“data”: null,
“code”: 666,
“msg”: “null”
}
项目异常处理方案
- 业务异常:例如用户没有按照规定写密码格式却能进入后台,而我们没有做对应的处理
- 发送对应消息传递给用户,提醒规范操作
- 系统异常:例如服务器宕机或者用户网络问题
- 发送固定消息传递给用户,安抚用户
- 发送特定消息给运维人员,提醒维护
- 记录日志
- 其他异常
- 发送固定消息传递给用户,安抚用户
- 发送特定消息给编程人员,提醒维护(纳入预期范围内)
- 记录日志
处理方法
在com.learn下创建exception文件夹,用来放置错误类
系统错误:SystemException
1
2
3
4
5
6
7
8
9
10
11
12
13
14
15
16
17
18
19
20
21
22
23package com.itheima.exception;
public class SystemException extends RuntimeException{
private Integer code;
public Integer getCode(){
return code;
}
public void setCode(Integer code) {
this.code = code;
}
public SystemException(Integer code, String message) {
super(message);
this.code = code;
}
public SystemException(Integer code,String message, Throwable cause) {
super(message, cause);
this.code = code;
}
}业务错误:BusinessException.java
1
2
3
4
5
6
7
8
9
10
11
12
13
14
15
16
17
18
19
20
21
22
23package com.itheima.exception;
public class BusinessException extends RuntimeException{
private Integer code;
public Integer getCode(){
return code;
}
public void setCode(Integer code) {
this.code = code;
}
public BusinessException(Integer code, String message) {
super(message);
this.code = code;
}
public BusinessException(Integer code,String message, Throwable cause) {
super(message, cause);
this.code = code;
}
}在controller中创建错误处理类ProjectExceptionAdvice.java
1
2
3
4
5
6
7
8
9
10
11
12
13
14
15
16
17
18
19
20
21
22package com.learn.controller;
import com.learn.Exception.BusinessException;
import com.learn.Exception.SystemException;
import org.springframework.web.bind.annotation.ExceptionHandler;
import org.springframework.web.bind.annotation.RestControllerAdvice;
public class ProjectExceptionAdvice{
public Result system(SystemException ex){
Integer code=ex.getCode();
String msg=ex.getMessage();
return new Result(code,msg);
}
public Result business(BusinessException ex){
Integer code=ex.getCode();
String msg=ex.getMessage();
return new Result(code,msg);
}
}在可能出现异常的地方抛走异常
例如在表现层BookController中抛出异常
1
2
3
4
5
6
7
8
9
10
11
12
13
14
15
public Result getById( Integer id){
Book book=bookService.getById(id);
Integer code=book!=null ? Code.GET_OK:Code.GET_ERR;
String msg=book!=null ? "":"查询失败请重试";
if(id==1){
throw new BusinessException("请不要用你的技术挑战我们的耐性",Code.BUSINESS_ERR);
}
try{
int i = 1 /0;
}catch (Exception e){
throw new SystemException("不好意思是我们的系统错误",e,Code.SYSTEM_ERR);
}
return new Result(book,code,msg);
}
让SpringMVC接管前端
- 需要在config中创建SpringMvcSupport
1 | package com.learn.config; |
- 在SpringMvcConfig的@ComponentScan注解中添加com.learn.config让SpringMVC能扫描到
拦截器
拦截器概念
拦截器是一种动态拦截方法调用的机制
作用:
1. 在指定的方法调用前后执行预先设定后的代码
1. 阻止原始方法的执行
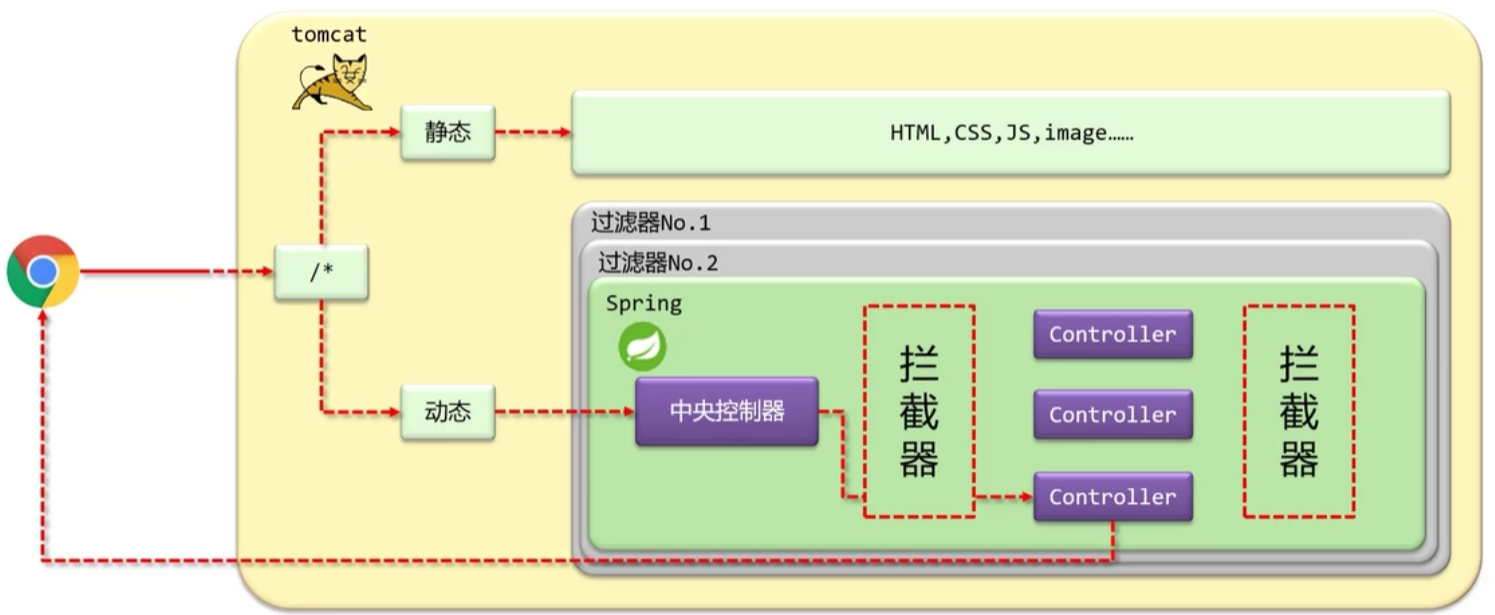
拦截器与过滤器的区别
归属不同:Filter属于servlet技术,Interceptor属于SpringMVC技术
拦截内容不同:Filter对所有访问进行增强,Interceptor仅针对SpringMVC的访问进行增强
执行时机
拦截器的入门案例
在com/itheima/controller/interceptor下声明拦截器的bean(ProjectInterceptor.java),并且实现HandlerInterceptor接口(注意:扫描加载bean)
1
2
3
4
5
6
7
8
9
10
11
12
13
14
15
16
17
18
19
20
21
22
23
24
25
26
27
28package com.itheima.controller.interceptor;
import org.springframework.stereotype.Component;
import org.springframework.web.servlet.HandlerInterceptor;
import org.springframework.web.servlet.ModelAndView;
import javax.servlet.http.HttpServletRequest;
import javax.servlet.http.HttpServletResponse;
public class ProjectInterceptor implements HandlerInterceptor {
public boolean preHandle(HttpServletRequest request, HttpServletResponse response, Object handler) throws Exception {
System.out.println("preHandle...");
//这里如果是false表示直接拦截,即直接退出
return true;
}
public void postHandle(HttpServletRequest request, HttpServletResponse response, Object handler, ModelAndView modelAndView) throws Exception {
System.out.println("postHandle...");
}
public void afterCompletion(HttpServletRequest request, HttpServletResponse response, Object handler, Exception ex) throws Exception {
System.out.println("afterCompletion...");
}
}在SpringMvcConfig中实现WebMvcConfigurer
1
2
3
4
5
6
7
8
9
10
11
12
13
14
15
16
17
18
19
20
21
22
23
24package com.itheima.config;
import com.itheima.controller.interceptor.ProjectInterceptor;
import org.springframework.beans.factory.annotation.Autowired;
import org.springframework.context.annotation.ComponentScan;
import org.springframework.context.annotation.Configuration;
import org.springframework.web.servlet.config.annotation.EnableWebMvc;
import org.springframework.web.servlet.config.annotation.InterceptorRegistry;
import org.springframework.web.servlet.config.annotation.WebMvcConfigurer;
public class SpringMvcConfig implements WebMvcConfigurer {
private ProjectInterceptor projectInterceptor;
public void addInterceptors(InterceptorRegistry registry) {
//可以添加多个拦截路径
registry.addInterceptor(projectInterceptor).addPathPatterns("/books","/books/1");
}
}拦截器三个方法的具体参数
前置处理

- 参数
- request:请求对象,可以拿取请求的数据
- response:响应对象,可以设置响应的数据
- handler:被调用的处理器对象,本质上是一个对象中的方法,对反射技术中的Method对象进行在封装,也就是说可以通过这个调用处理器对象中的方法
- 返回值
- true表示继续执行
- false表示终止执行
后置处理

参数
- ModelAndView:如果处理器执行完成具有返回结果,可以读取到对应的数据和页面信息,并进行跳转之类的调整
完成后处理

参数
- ex:如果处理器执行过程中出现异常,可以针对异常情况进行单独处理